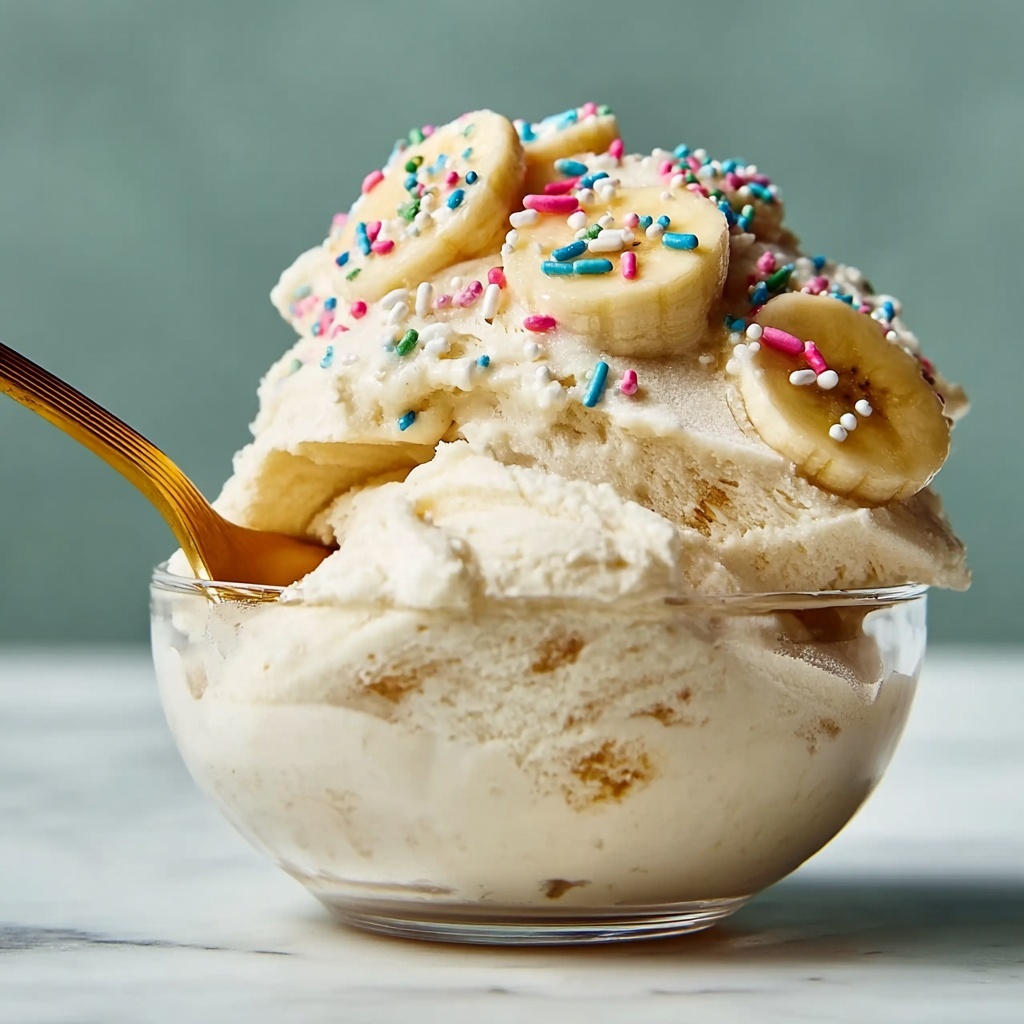
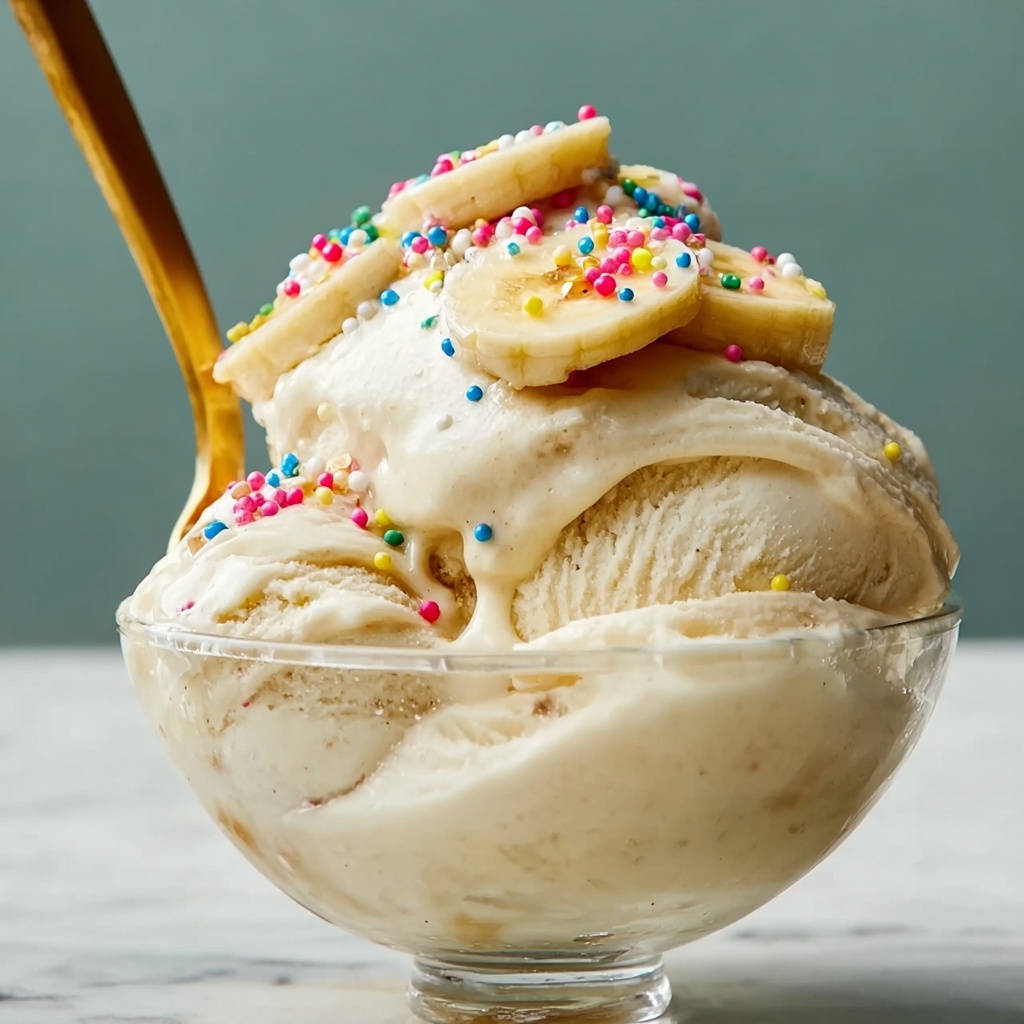
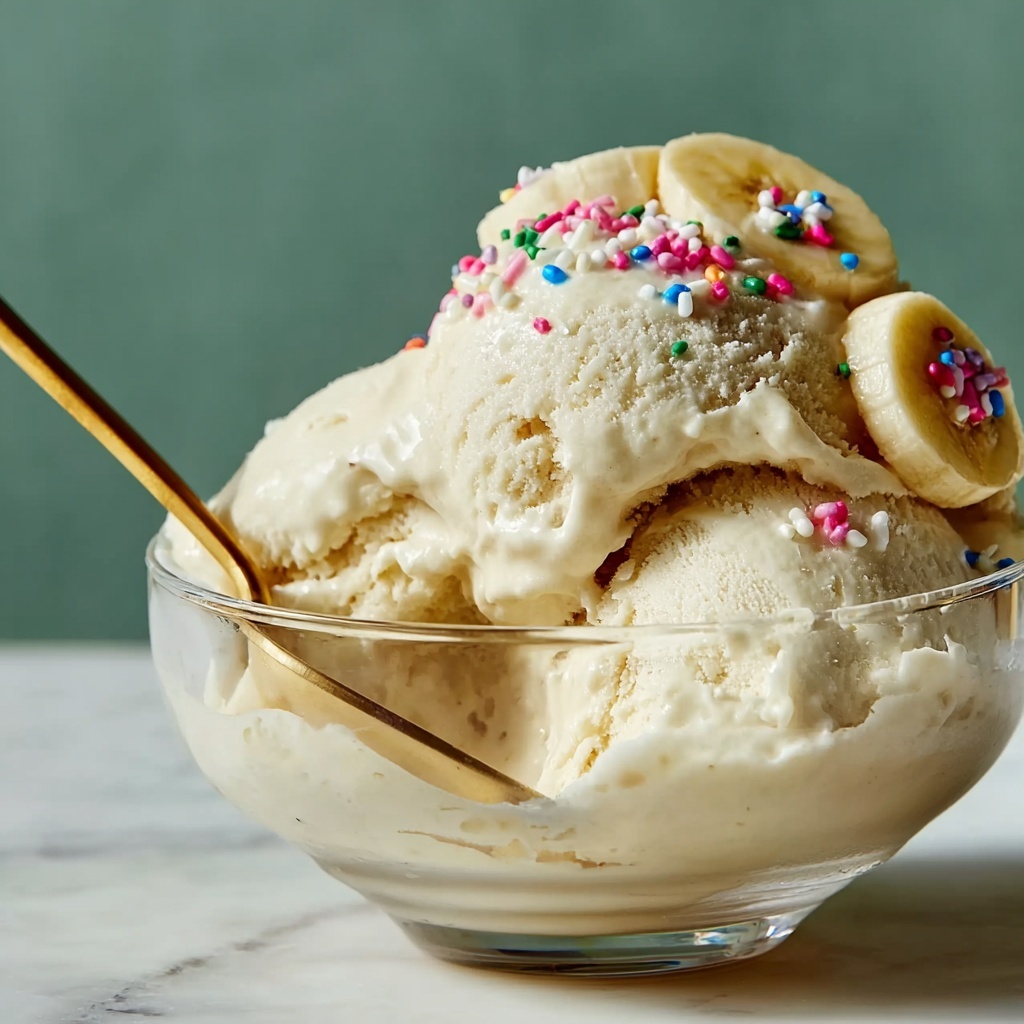
If you’re craving a sweet treat that feels indulgent but keeps things light, look no further than The Ultimate Dairy-Free Banana Ice Cream Recipe. This delightful dessert is a smooth, creamy delight crafted entirely from ripe bananas, proving that you don’t need dairy to enjoy luscious, scoopable ice cream. It’s naturally sweet, easy to make, and perfect for anyone who wants to indulge in a wholesome, guilt-free frozen delight. Whether you’re dairy-free, vegan, or simply searching for a refreshing way to enjoy bananas, this recipe is a must-try that turns everyday fruit into a luscious dessert.
Ingredients You’ll Need
Creating The Ultimate Dairy-Free Banana Ice Cream Recipe is wonderfully straightforward thanks to a handful of simple, natural ingredients. Each one plays an essential role in delivering perfect creaminess, subtle sweetness, and that irresistible smooth texture.
- 4 ripe bananas: The star of the show, ripe bananas bring natural sweetness and a creamy texture when frozen and blended.
- 1/2 teaspoon vanilla extract (optional): Adds a gentle warmth and depth of flavor, elevating the ice cream’s natural sweetness.
- 2 tablespoons plant-based milk (optional): Useful for achieving an extra smooth, creamy consistency during blending, especially if your bananas are a bit firm.
- Optional toppings: Chocolate chips, chopped nuts, caramel, or peanut butter add delightful texture and flavor contrast for a personalized touch.
How to Make The Ultimate Dairy-Free Banana Ice Cream Recipe
Step 1: Prepare and Freeze the Bananas
Begin by peeling and slicing your ripe bananas into even pieces. Lay them out in a single layer on a parchment-lined tray — this keeps the pieces separate and makes blending easier later. Pop the tray into the freezer and let the bananas chill for at least two hours until they’re completely solid. This freezing step is key to achieving that creamy, ice cream-like texture without any dairy.
Step 2: Blend Until Creamy
Once your bananas are solid, transfer the frozen slices to a food processor or a high-speed blender. Blend the bananas, pausing occasionally to scrape down the sides, until the mixture becomes luxuriously smooth and creamy. This part takes a little patience, but trust me — the transformation from frozen chunks to silky “ice cream” is pure magic.
Step 3: Add Flavors and Adjust Texture
If you want to turn the banana ice cream from good to unforgettable, now is the moment to add your optional vanilla extract and a splash of plant-based milk. Vanilla provides a warm, inviting note, while the milk helps smooth out any remaining thickness, making every bite delightfully creamy. Blend again briefly to incorporate these extras evenly.
Step 4: Serve or Freeze for Later
You’ve got options when it comes to serving! The ice cream is perfect as a soft-serve straight from the blender if you love a luscious, spoonable texture. Or, transfer the mixture to a container and pop it back in the freezer for another hour or two if you prefer a firmer, scoopable consistency. Either way, you’re in for a delicious treat.
How to Serve The Ultimate Dairy-Free Banana Ice Cream Recipe
Garnishes
Enhance your bowl of The Ultimate Dairy-Free Banana Ice Cream Recipe with delightful toppings that add texture and bursts of flavor. Think crunchy chopped nuts like walnuts or pecans for contrast, chocolate chips to make it feel extra indulgent, or even a drizzle of natural peanut butter or caramel sauce to deepen the taste experience. These simple additions make every bite exciting.
Side Dishes
Serve your banana ice cream alongside warm desserts like vegan brownies or baked fruit crisps for an irresistible combo of hot and cold. Fresh berries or a light fruit salad also complement the creamy texture perfectly, adding a refreshing balance.
Creative Ways to Present
Feeling playful? Serve this ice cream in waffle cones made from coconut flour or even inside hollowed-out fruit like pineapple cups. Layer it with dairy-free yogurt and granola for a parfait that looks as good as it tastes. Presentation elevates the experience, so let your creativity shine!
Make Ahead and Storage
Storing Leftovers
If you have any leftover banana ice cream (though that’s rare!), store it in an airtight container in your freezer to keep it fresh. Press a piece of parchment paper directly onto the surface to prevent ice crystals from forming and maintain that creamy texture.
Freezing
This recipe freezes beautifully. Once blended, you can freeze it in any container that seals well. When you’re ready to enjoy it again, let it sit at room temperature for about 10-15 minutes for easier scooping.
Reheating
Since this is a frozen dessert, reheating isn’t necessary or recommended. Instead, if your ice cream becomes too hard in the freezer, just let it soften slightly at room temperature or give it a quick blend to revive its creamy texture before serving.
FAQs
Can I use bananas that are not fully ripe?
For the best sweetness and creaminess, always use bananas that are very ripe, with plenty of brown spots. Under-ripe bananas are starchy and will result in less flavorful and less smooth ice cream.
Is this recipe suitable for vegans?
Absolutely! The Ultimate Dairy-Free Banana Ice Cream Recipe uses no animal products, making it perfect for vegans and anyone avoiding dairy.
Can I add other fruits to the banana base?
Yes! Feel free to blend in berries, mango, or cocoa powder to create new flavors. Just keep in mind the water content of the fruits, as too much might affect the texture.
What’s the best way to get a scoopable texture?
After blending the bananas, freeze the mixture for 1–2 hours. This firms it up without making it rock hard, perfect for classic ice cream scoops.
Can I make this recipe without a food processor?
A high-speed blender works wonderfully as well. Just be patient when blending and scrape down the sides often to ensure everything gets creamy and smooth.
Final Thoughts
I truly can’t recommend giving The Ultimate Dairy-Free Banana Ice Cream Recipe a try enough — it’s one of those deliciously simple pleasures that feels like a treat but is wholesome and natural. The creamy texture, natural sweetness, and endless ways to personalize it will quickly make this your go-to dessert. So gather those ripe bananas, and get ready to indulge in your new favorite frozen delight!
Print
The Ultimate Dairy-Free Banana Ice Cream Recipe
- Prep Time: 10 minutes
- Cook Time: 2 hours (freezing time)
- Total Time: 2 hours 10 minutes
- Yield: 2 servings
- Category: Dessert
- Method: Blending
- Cuisine: American
- Diet: Vegan
Description
Enjoy a creamy, dairy-free treat with this ultimate banana ice cream recipe. Made from just ripe bananas and optional natural flavorings, this simple dessert is perfect for a healthy, vegan-friendly indulgence that requires no added sugars or dairy.
Ingredients
Main Ingredients
- 4 ripe bananas, peeled and sliced
Optional Ingredients
- 1/2 teaspoon vanilla extract
- 2 tablespoons plant-based milk (for smoother texture)
- Optional toppings: chocolate chips, chopped nuts, caramel, or peanut butter
Instructions
- Freeze Bananas: Slice the bananas and arrange them in a single layer on a parchment-lined tray. Freeze for at least 2 hours or until completely solid to ensure creamy texture when blended.
- Prepare for Blending: Transfer the frozen banana slices to a food processor or high-speed blender suitable for crushing frozen ingredients.
- Blend for Creaminess: Blend the frozen bananas until the mixture becomes smooth and creamy, pausing to scrape down the sides as needed. This can take a few minutes depending on your appliance’s power.
- Add Flavors: If desired, incorporate vanilla extract or a splash of plant-based milk to enhance flavor and create a smoother consistency.
- Serve or Freeze: Enjoy immediately as a soft-serve ice cream or transfer to a container and freeze for 1 to 2 hours if you prefer a firmer scoopable texture.
Notes
- Using ripe bananas with brown spots maximizes natural sweetness.
- For a creamier texture, allow the banana slices to fully freeze and use a powerful food processor or blender.
- Experiment with optional toppings for added flavor and texture.
- This recipe is naturally vegan, dairy-free, and gluten-free.
- Serve immediately to enjoy soft-serve consistency or freeze longer for traditional ice cream firmness.
